Last one with the green. I’ll try and work something out for shooting a time lapse tomorrow at the bridge, but I need to plug into power to go for longer than 2-3 hours so it may not happen :(
Time Lapse – Day 2
Day two!!!!
Filming day 2, Ton’s gallery
And here’s the pictures of today’s shoot. We enjoyed working with the actors tremendously! Lots of kudos to Derek de Lint, Rogier Schippers and Jody Bhe! (Sorry, the gallery is unsorted, the silly plugin refuses to work with me :)
Filming Day 1, Ton’s Gallery
Here’s my photographic impression of the first day filming, starting with breakfast at 7.30 until the last shot at 17.45.
Time Lapse – Day 1
Best way to reflect on the first day? watch the whole thing again in under a minute.
Live studio cam!
Live stream url: http://twitcam.livestream.com/9wru3
Greeeeeeen
Today was the first day of production in the greenscreen studio at Amsterdamstudios.nl. No filming yet, but building the sets for the first day of shooting on monday. Romke brought in his awesome stuff, 2 truck loads full of assets, props and sets. The team had some really hard work to do today!
The studio is super great, with a giant greenscreen, a white limbo, separate rooms, and first floor for catering. The guys from Amsterdamstudios.nl even put a Blender logo at the door! :)
Result: random video with lots of green pixels. Plus some Russian punk from “Green Team”.
The Drill of Death. Mango Weapons Workshop.
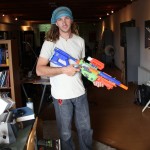
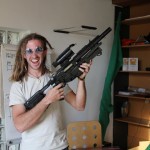
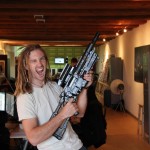
Last week we had a lot of fun producing various props for the movie, for example an assault rifle and grenades for Barley, hand gun tracking devices for the scientists, an eye patch for the captain and some other things. It was great fun to take a break from sitting in front of the computer and instead going out, hunting for props, assembling stuff and doing some real physical work.
Jeremy made us a kick-ass assault rifle out of a bunch of plastic nerf guns!
is it dome yet?
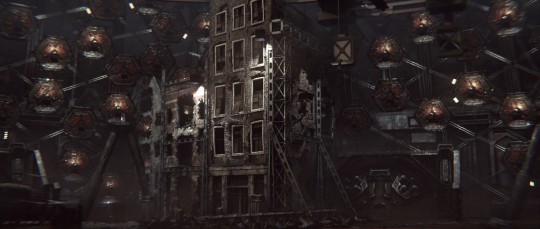
The modelling for the dome environment is proceding steadily, here’s a test render (from last week, actually) :
Light design and compositing are totally temp, the shaders will need lots more testing and you can easily spot some meshes that are still at previz-level-of-detail.
This week I was more focused on modelling details so that for the shooting (or right after it) shots can be framed and setup with a good idea of the final shapes and silhouettes (see renders at the end of post).
Set Mass tool – Script
In physics simulations it’s very handy to make objects have a mass value based on their size. So for instance if you have one big and several small objects in a simulation(that are made of the same material) then the big object should be able to move and affect the smaller objects more then the other way around.
So we asked Sergey if he could write us a tool that works by checking the bounding box of the selected objects and gives them a mass value based on their size. And so he did! it didn’t take him long :)
Download the addon here:PhysicsTools.py

