4 TB original 4k footage available as CC-by

by - 2013/03/15 13 Comments Compositing, Development, Filming, Production

Thanks to our friends at Xiph.org we now can offer everyone access to the original source footage of Tears of Steel.

You’ll find something like 80,000 frames, each in OpenEXR half float files, in 4096 x 2160 pixels. This is 5 times more footage than used in the film, including unused shots, but mainly it’s because of long lead-in and lead-outs, and of course we’ve been cutting shots sharp.

Pictures have been shot using the (4k native sensor) fantastic Sony F65 camera. The raw files were converted with Sony software to OpenEXR, using ACES color. We then converted these with OpenColorIO to Rec709 “scene linear” which we further used for the movie pipeline.

Before we started with this VFX project we already noted a huge lack in available free high quality footage for motion tracking, keying and cleaning testing. With this huge data set this problem now belongs to the past forever!

Browse the full catalog at Xiph.org here.

Note about Creative Commons Attribution: apart from the obvious crediting, you have to be aware that the actors keep their Personal Image (Portrait) and Privacy Rights. That means the footage is OK to use for technical demos, showcases, tutorials etc. But not to use the actor for making a commercial. Read more here.

Have fun!

-Ton-

(BTW: xiph.org is currently syncing files from another server, arrival of all footage finishes in a few days).

Compositing Breakdown Video

by - 2012/11/03 5 Comments Compositing

One of the many features you can find on our DVD is an extensive 9 minute (!) VFX breakdown video. It was edited by Pablo Vazquez and shows some of the most stunning shots of Tears of Steel! A huge thanks goes to Joram who gave me his Ok to mangle his soundtrack.

Enjoy!

Masking tips

by - 2012/08/27 17 Comments Compositing, Production

Hi! Today I prepared a few tips about masking, I hope they will be useful for you.

1. Analyze the sequence. Try to figure out which parts of the object are overlapping, moves in different directions (arms, legs, body of walking man; protruding elements and body of a car (eg: mirrors, antenas, lights on the roof); ears and nose when head turns). For each of those overlapped objects you should create separate mask. Obvious masks also should be overlapped, not end-to-end (only just touching).

Its a good idea is to create separate masks for parts with different kinds of motion. For example, if a man stays still and shakes his head actively, you can create separate masks for head and figure. But someone moves across the screen in a straight line and hold his head straight, you’ll need separate masks for arms and legs, and you can create single mask for head and body.

It’s important to create masks namely for objects, not for spaces between them.
For example, if a man is waving a flag held with both hands – Then the overall shape the hands, body and flagstaff would be much more consistent and easy for masking, than it would be if the whole body’s silhouette and spaces between arms and body.

Never try masking out a group of moving people with a single mask. The same thing applies for clenching fist. In this case you should use separate masks for each knuckle.
Also for complex shapes, use several masks with just one “working” side (see below)
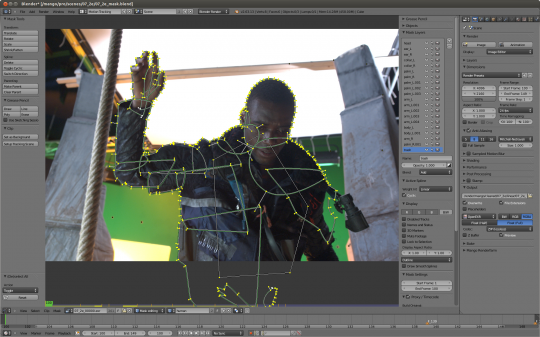
2. Always use tracking where possible. If the shape of the object changing slightly, and you have translating, rotation or zoom in the sequence, you can track the motion and attach mask vertices’s to the track. In this way you’ll get general motion and you’ll need create much less keyframes for compensate inaccuracy of tracking.

3. Find the frame where you can see whole object. Start masking from this frame. Try to use as few mask points as possible for the objects outline. Otherwise it could be hard to animate.

Next, to avoid jittering and sudden movements of mask, animate the mask in several passes. Firstly create basic keyframes and then add keyframes where its necessary.

4. First pass. Find the key moments – beginning of objects moving, stopping, changing speed. Create certain amount of keyframes accordingly.

While animating a mask its easy to forget the origins of the mask points – so for eg: what starts as the point of an elbow may end on the wrist by the end of the animation. – This should be avoided because the areas in-between the keyframes tend to look bad and you end up adding more keyframes to compensate for it.

5. Second pass. Check how mask interpolates between keyframes and how it follows the movement of object. Add keyframes where the mask has the most significant offset from the object. Repeat this 3 or four times.

Once you have the bare minimum number of keyframes needed, the masks animation will look smooth so you’ll be able to adjust mask’s shape with less effort.

Now you can enable motion blur on the mask node, adjusting individually for each shot. In Blender I usually use Shutter = 0.25-0.35.

One more time – less points, less keyframes as you can!

Big thanks to Alexey Shavrov and Campbell Barton for help with this post.
Just three more weeks to go!

by - 2012/08/06 18 Comments Compositing

Time is flying like crazy, and we only have 3 more weeks to go until pre-premiere.
So we do a little bit of time-travel and go back 1 week in time when we have a whopping 4 weeks left until premiere and do some interviews and random stuff to give you some impressions from the studio.

And now it really is crunchtime!

Tracking, Keying and Layout. Workflow Demo.

by - 2012/07/11 36 Comments Compositing, Production

Here’s a little timelapse of the general workflow for our keying shots.

First we track the camera and save that as a blendfile. From that file we generate a new file that is then used as base for masking and keying. The tracking markers can often be re-used as a way to mask out stuff from the footage.

The cleaned footage is then saved as 4k openEXR files with premultiplied alpha channel.
A third blendfile is created as a base for that layout, swapping the footage for the clean plates and setting up the final shot dimensions (1920×800). That file is then handed over to the person that is then doing the layout for it. The scene layout for this scene was originally done by Andy.
Usually after the main composite is done I fix some alpha-blending issues that cannot be solved in the pre-key outside the main composite.

The key that you see here is still a little but too harsh on the one side of the head, but for the demo I didn’t want to tweak it too long.

timelapse: cleaning background plate (WIP)

by - 2012/07/10 18 Comments Compositing

for a wide angle shot we needed a clean plate that’s going to be mixed with holographic effects of Amsterdam. unfortunately there was no clean plate shot, that’s why we had to clean it up by hand in gimp. for the scale to look more correct, a lamp had to be removed. also the shadows had to match the footage shot on that day and people on boats and in the street had to be erased.

this is a timelapse recorded during the photo touchup process. there’re still some obvious mistakes, but since this is only the base of the background for that particular shot I hope they will not draw any attention.

Continue

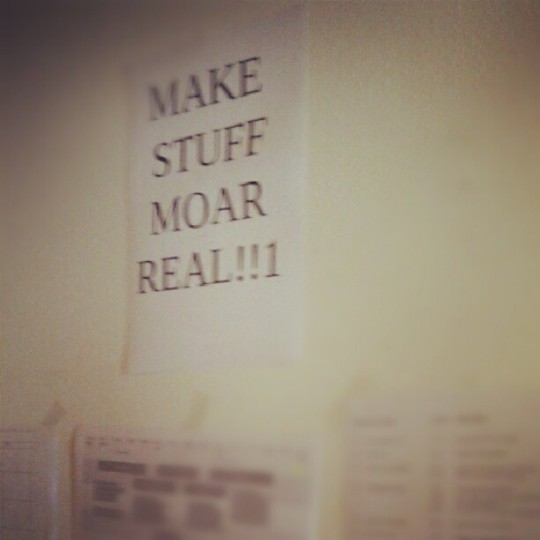
“Make Stuff More Real”

by - 2012/07/06 34 Comments Artwork, Compositing

AndysInspirationalPosters.com
(Not a real site. But it should be.)

So!

Sooo……..

We’re making a movie. And it has a lot of VFX shots in it (110ish?). And they were not photo-real enough. So now we’re making everything more realistic! And keeping up with our quote of 50 seconds per week.*

You want to know what’s tricky? Staring at a picture that looks pretty good, but not entirely realistic, and trying to figure out what exactly is off about it.

Continue

Andy shares his screen and does compositing stuff

by - 2012/07/02 10 Comments Compositing

Hi!

Today I’m going to work on more shorts from the inside of the command center. Mostly set extensions and integrating the Captain, Thom and Ghengis into the CG environment. I decided to share my screen for today and let everyone look over my digital shoulder. I’ll try to keep it entertaining, but since I’ll be rendering, sometimes things can go slow :)

edit: I’m sorry, it looks like this turned out a typical monday, with lots of off-screen discussions, so I had to stop the screen sharing. I will resume this experiment at another point in time probably.

edit2: Scroll down for tuesday!

Continue