
Hello Mango!

border rendering in viewport
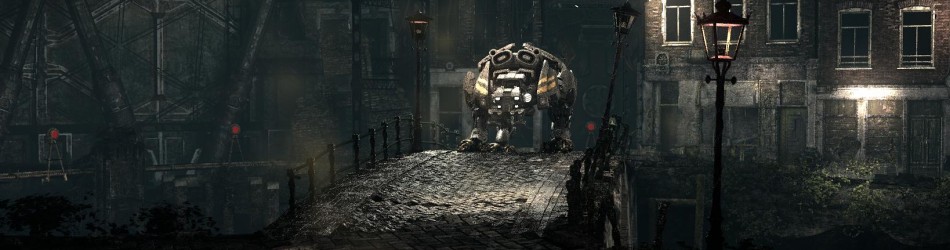
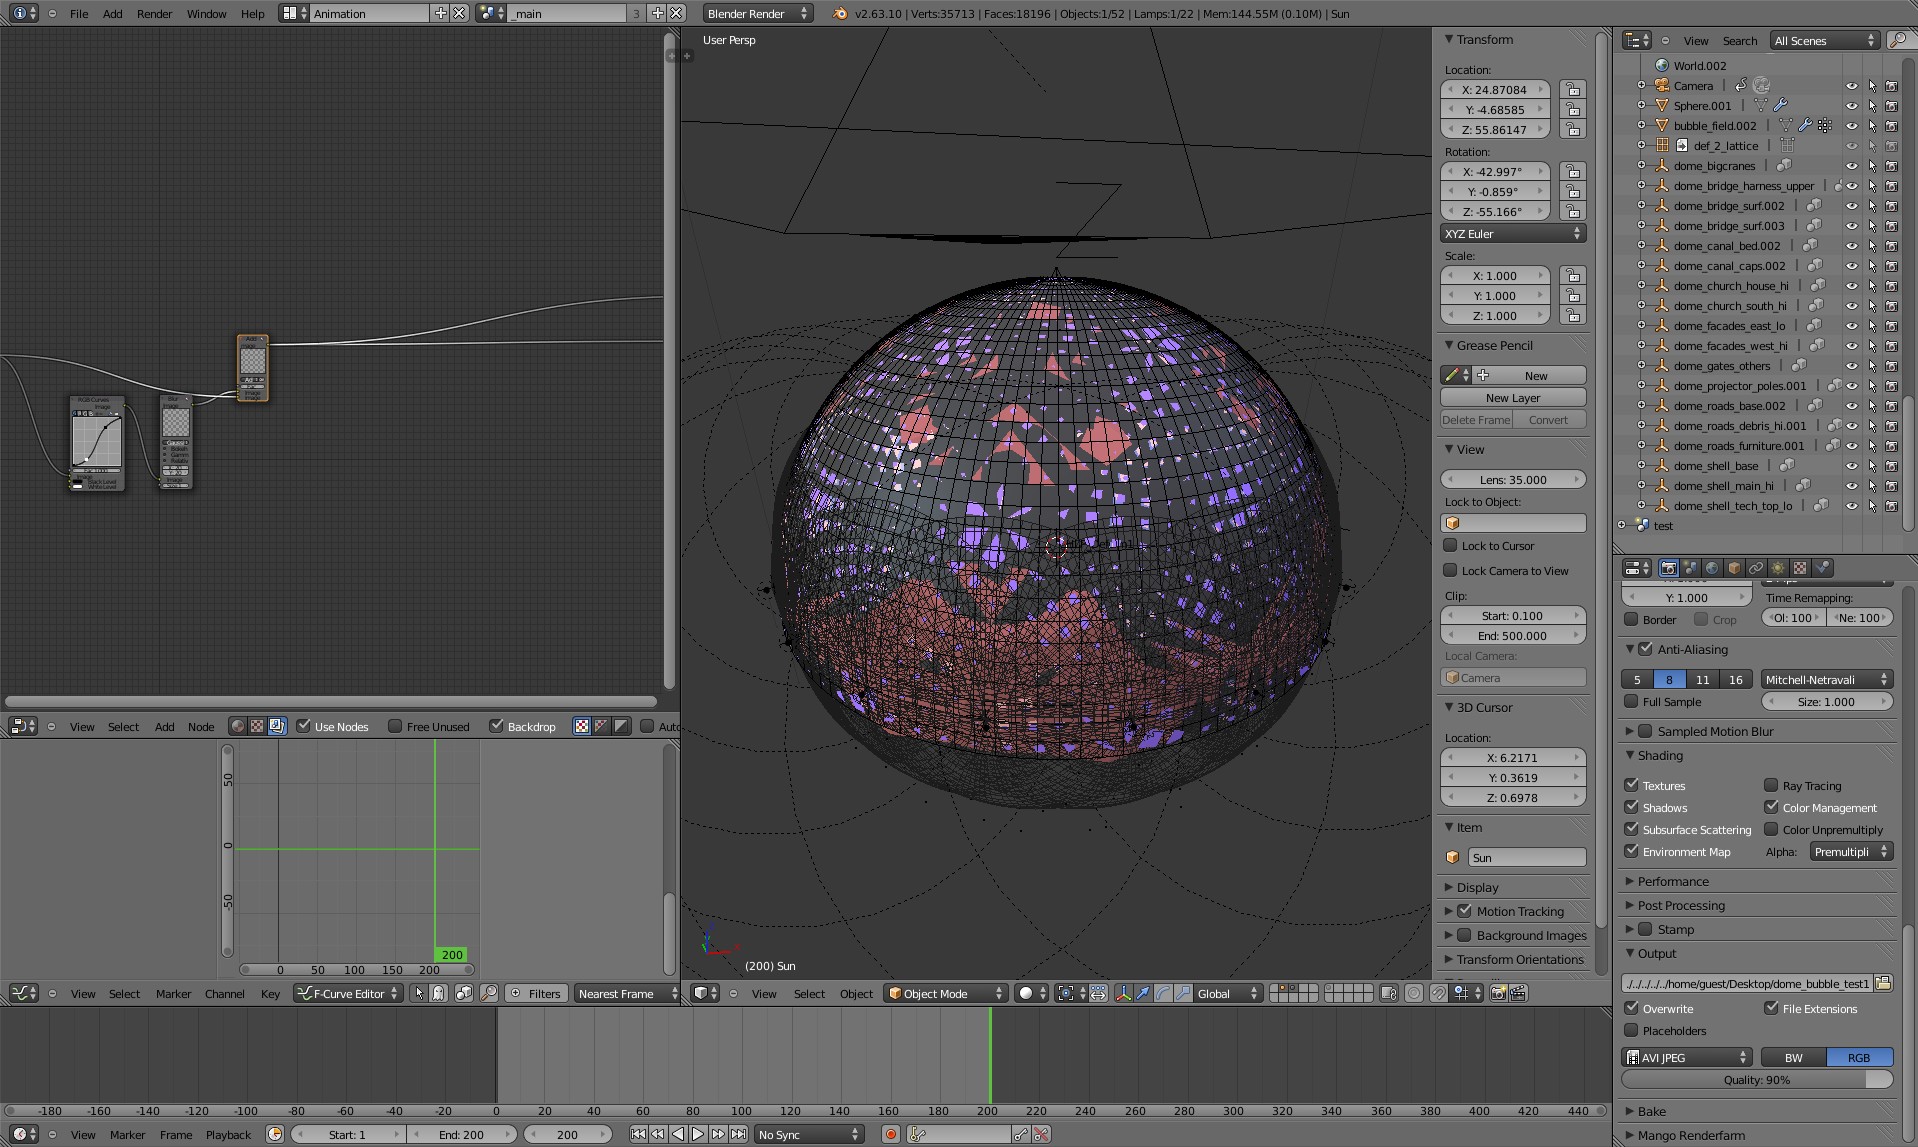
My first week was focused on getting familiar with the production pipeline and structure. I also worked on lighting the amazing dome environment. Starting out a bit slow at first, thanks to a few great additions to Cycles by Brecht things were picking up speed! Spot lights were added to Cycles: and thanks to border rendering in Camera View we can now quickly render portions of our viewport at a higher sample rate.
Further, I started working on the holographic bubble of science-ness:


it’s a fairly straight forward setup using animated materials and modifiers to distort a wireframe sphere. the final test render uses 3 render layers:
- Blender – Internal Bubble graphics
- Cycles – Old Amsterdam
- Cycles – Dome

That first render… O_O
Would love to have the first render as a background on my pc with a higher sample rate, Please ;)
+1
Andy, please update the image to 1920-1080 and to higher sample rate !
agreed, I’d also like it as background, that looks awesome :D
Yeah, would love to have this at higher res too. Would use as a wallpaper.
Ooh. Are spot lights in trunk??
yup!
What a great stuff to see. It’s all just fantasy. brilliant guys
I love the holographic bubbles too, can’t wait to see their role in the film. Just worried, everything is so very dark and hard to see… Most folks will view this production on youtube, not a cinema. Dark and dim becomes invisible when compressed for the web.
We are working on this issue. At the moment our monitors are set to very low brightness. That being said, so far there hasn’t been made any effort to properly calibrate them (*ehem*). Luckily after various loooong discussions we managed to convince Ton to get a hardware calibration tool (http://www.hughski.com/) so we can finally be sure that we see the right thing (and more importantly, that every monitor in the studio shows the same image.
Another issue is that some shaders and textures are very dark and muddy to begin with, we also need to improve that.
You don’t need calibration hardware to see that the images are too dark! Also during Sintel we had to keep re-adjusting screens here to be less bright. The nvidia display settings just seem to pop back to defaults often.
Just trust your eyes, always check the display with a couple of reference images, check on various display types and OS’s. Calibration then is for the final tweaks, for special color spaces and to make it really awesome.
I understand there is some artistic desire to make it look “gloomy”, but I agree with Ton- you have to be able to SEE it first.
Worry about the gloomy/night part later. In real photography, even for night shots, they often have to ADD light and then make it darker using a camera filter or adjust the coloring in post so that you can see the things you need to see.
Since you are trying to achieve photo-realistic, why not use a process that is more like photography?
See this thread:
http://blenderartists.org/forum/showthread.php?167565-Filming-Night-Scenes
“You don’t need calibration hardware to see that the images are too dark!”
A proper color space dictates the curve, primaries, white point, and viewing environment. “Too dark” is a result of these variables, and calibration / profiling, along with color management solves this.
“Also during Sintel we had to keep re-adjusting screens here to be less bright.”
Again, this is a byproduct of a lack of a color managed / aware pipeline. The point of color management is to assert that the creative intent of your images is consistent across devices and environments.
“Just trust your eyes, always check the display with a couple of reference images, check on various display types and OS’s.”
Eyes compensate to viewing ambient white point and ambient brightness, in addition to the relative primaries, white point, and curvature of a given color space.
So while some may insist on trusting one’s eyes, others may wish to trust education and a color managed pipeline instead. A color aware pipeline accounts for precisely the complexities listed.
Ton: You can’t trust your eyes if you’re wearing orange glasses. :-p
You have to make sure first that what you see in your screen is the best it can give.
Some calibration devices even measure ambient lighting to accomodate brightness to different lighting conditions.
Calibration/Profiling isn’t for final tweaks. It’s essential to make sure that textures, imported assets and even renders look as they should before those tweaks. Otherwise you’re just accumulating errors, not tweaking.
Regarding nvidia-settings screwing screen correction, that application seems to reset the display LUTs every time you start it.
If you don’t use it, it won’t affect screen correction, but if you have to use it frequently it’s just matter of reloading the color management software used to correct the screen and it will re-load the profile.
Gnome-Color-Manager doesn’t seem to play well with nVidia proprietary drivers, so you should use DispCalGUI (http://dispcalgui.hoech.net/)
Quite detailed: in this case it looks like a good time to start seeing those performance improvements that have been talked about for CPU rendering so as to be able to knock these scenes out at a fast enough rate for animation.
I mean especially considering where the movie industry is headed when it comes to resolution (4K resolution which for one thing completely dwarfs HD in the total number of pixels involved, definitely not something that can readily be done with an unbiased engine on consumer hardware unless the engine in question has a very high level of performance optimization and a highly developed sampling system)
Wooooo! Go Andy! Super excited that you’re on the project! :-D
*hugs!*
Is it just me or do a lot of these dome renders have a very “painterly” quality to them? Especially the stuff in the background. Is that just from low sampling or is that something that is being done on purpose? It looks kinda cool, but was just wondering.
that’s a very good point. the samples in these shots are low (given the fact that they’re just ‘quick’ testrenders). combined with bilateral blur on various passes(to remove noise) this makes things very blurry.
also… although the shaders are very well done, they currently have a distinct stylized look, which makes live action integration very hard. we’re trying to address this issue as soon as possible. for the integration two possible solutions come to my mind:
1) degrade the live action footage to make it look more stylized
2) adjust textures and lighting to look more photoreal.
Of course, 2) is the most desirable of them, but very hard to achieve given the amount of stuff we see. Not impossible though, we’ll see!
How much longer are the render times if you want to get rid of the noise entirely?
currently we’d have some shots rendering roughly up to 1 hour 40 mins per frame, which is unacceptable.
And if you render them on the Tesla GPUs? Are they being used at the moment?
God that looks nice! :D
Just one question : Will you add a native text support in the “video sequence editor” ? If not, there is an easy and fast way to add simple text in VSE (instead of using “view 3D”)?
mango team should submit that first render to blenderguru’s photo-realistic competition! :P
J.: Yes I currently use a Tesla on my computer, but for rendering 400 frames you really need a renderfarm. that being seid, yes, a tesla renderfarm would be nicer, since shots are just up to twice as fast.