The env. modelling phase is really approaching the end now!
i’ve been working remotely for the last 3 weeks , and next one is my last on the project ! sigh ! but it’s time for the models to be final since further steps depend on that.
Last weeks have been basically a big post-apocaliptic spring-cleaning, going around the dome fixing and adding all the missing bits . Once you’re done ‘adding’ things, there’s always a quite important phase of going over everything again and ..clean up, complete and repair.
Continue, to read more about this and control center detail modelling :
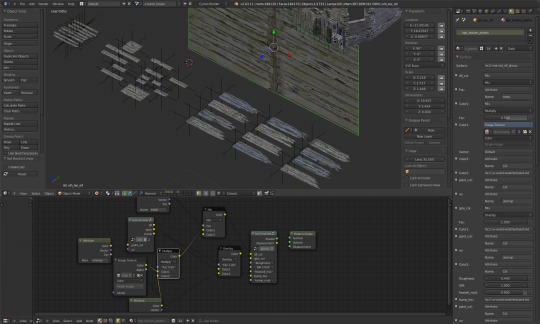
I haven’t been rendering much lately, just quick renders just to look at passes : mostly difcol to balance texture brightness , like here:
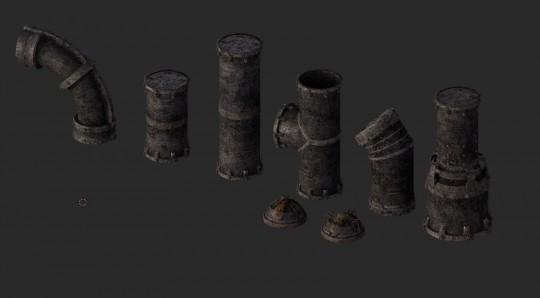
And working on greeble kits:
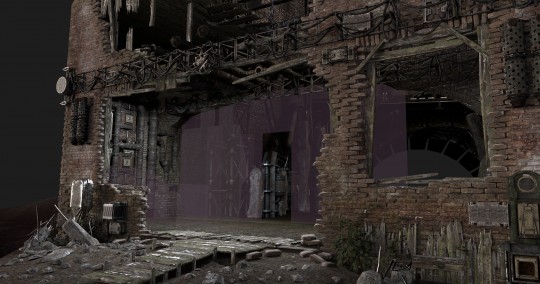
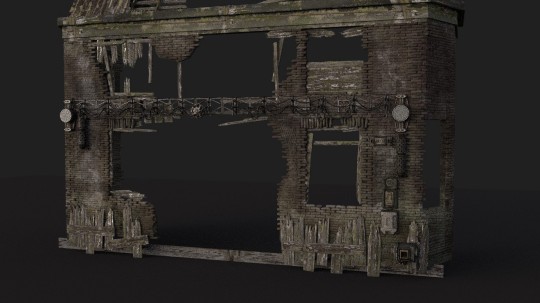
Then, This week was about the control center (the house attached to the south facade of the Oude Kerk)
This is how it looked at the beginning of the week :
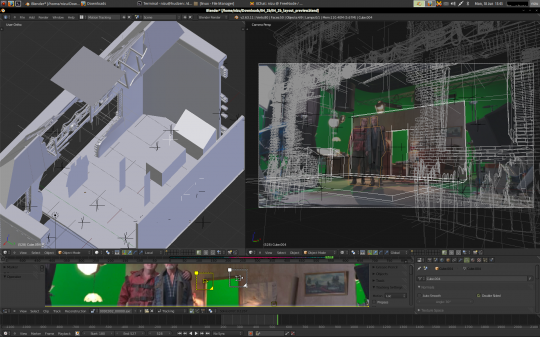
So i started by taking reference data from Sebastian’s tracking file.
What i did is mostly outside of the actual tracking/masking/shot set up done by Sebastian/Roman/Andy and others. I just lined up camera and env. , then traced a rough reference mesh for actors and elements of the set , imported the 2 into my dome file and went on modelling knowing set dimensions and shot framing.
Back to the actual modelling , it was pretty much a greeble-fest : tech pieces , wires , broken wood planks and beams … 80% of this scene is dupli-group objects , for 2 reasons : to reuse them elsewhere and to be able to move stuff around : if doing the last shot in this set turns out that something is blocking the camera path you don’t want to have to modify meshes , redo uvs and paint textures, etc..
Some of the objects you’ve already seen , but the metal pipes , the wires and concrete debris were made for this set.
Clearly the other big topic is the bricks : single brick meshes on the edges , textures for the inner parts of the wall , various blended layers of tileable textures for the fine patterns , vertex color and random-by-object color respectively to give specular highlights on edges and base color to each brick , and a custom painted grungemap to give a dirt gradient and big patterns over the whole facade.
And this is the current render: (but still no comp nodes or real light design yet , that will happen when actual shots are setup)
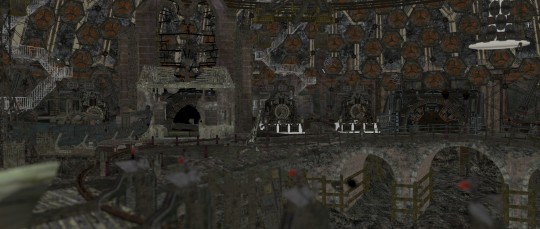
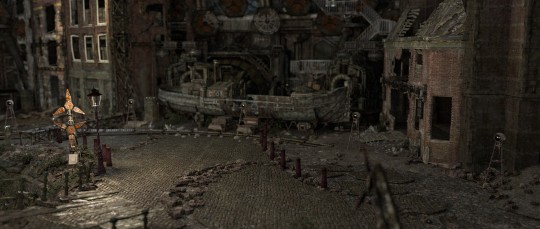
next step is to move outwards and apply new ground textures and debris around here (church) , the bridge area and scientists boat (which is the other set i’ll refine next week)
Here’s a quick render , a bit more work can be done on this base for the ground, then debris and detail objects can be placed to fill up, based on the precise shots framing (..there’s also the risk of putting too many detail objects all over , and that would be too heavy…) :


Whaaa looks so great congratulation
By the way : “Solve Error : 0.1267” => waaaa
Oooh, greeble kits are something to look forward to! Great work.
Very well done!!
A recurrent error that i have seen in this mango renders that destroy the nice renders is the bad use of DOF. The last render seems a miniature, for get such a level of DOF in a real scale, you will need a camera with a lens of 2 meters diameters or so.
Please mango team refers to a Depth of field in google to understand how to use it.
an APS with a lens about F/2.8 already has more DOF than this, so you are wrong :). Look at street videos with 5D MKII / III for example and you’ll see what DOF can be ;)
But I agree, the last one looks like miniature, not because of DOF but because of light ! It looks like a miniature Under a giant lamp :p
Well, not really. The “Dof” has to do with the focal length of the lens, the aperture, and the distance of the object in focus. Just judging by eye that render is using an 20-24mm lens, and there is no way that an aps or 36mm sized sensor would give that dof (unless using some kind of tilt shift lens). This breaks the reality of the scene making it feel like a miniature set at a 10-15cm from the lens.
I would think that the DOF would match the live action plates for the final composite, am I right?
Ah yes , that too , of course you’re right.
But these have nothing to do with finals, it’s just for ‘debugging’ the models.
To avoid confusion when posting and when i look at them myself, I should use no dof, quick nodes enhancements or any other thing that i can’t spend time on getting right.
I really love it. The detailing is great. Love the brick-work.
Ric is right about the DOF being responsible for the miniature feel. I can’t say that it is something I have repeatedly noticed on Mango (perhaps because I am not following as closely). I do find it is a very common issue in CG especially amongst more junior artists.
This was probably just a quickly set-up test render. I am sure they will use real world sensor sizes, focal lengths and aperture.
Excellent work and I can’t wait to see all the environments in full action, fully rendered.
“still no comp nodes or real light design yet , that will happen when actual shots are setup”
It would be a waste of time to do perfect setups just to see if the modeling and texturing is good. Just wait a bit for final renders :)
.. thanks for quoting that.
Indeed i’m soo eager to see some finals of the dome and get a better idea of the final result .
On one hand you can judge the models only to some degree without a complete lighting and compositing work.
on the other i was thinking this week just how much more i managed to do by not caring at all about the renders ! and just caring about obvious modelling/texturing fixes.
Honestly i setup that camera duplicating another one without even checking dof and focus settings :) , the only thing i looked at was the modelling and placement of debris on the ground and the balance of textures.
Thanks for the detailed breakdown Nicolò – really informative!
What’s your workflow on creating the large amount of the edge brickwork – start from arrays of the same brick, apply array modifier and then manually offset slightly? Do you manually modify each brick to make them unique or does a deform modifier help out here?
Anyway, great job Nicolò. I hope they sneak you back in for a bit more work later – your environment sets have been amazing! Hope you do some video tutorials on the Mango DVD about the processes/workflow that goes into creating the various set areas (creating environments is time consuming so would be great to see some tips to help speed things up).
+1 to having some video tutorials on your environment modeling/texturing workflow, it’s fantastic! I suppose that building is a ‘hero’ building being so close up so you’re obviously going to spend more time on the detail. A tutorial on this and the lower detail background environment would be great (especially the mix of individual bricks, textured brickwork and overall ‘grunge’ textures – I can’t imagine where to start to balance all those techniques).
Cheers
Hi, thanks!
I plan to do tutorials or at least walk-throughs of the modelling choices, i’ll be done with the actual work next week, but i’ll keep posting , starting with something about the shaders presets ..
And the brickworks -at different details- are a big topic , but though! : infact i’m currently re-doing these : i’m tuning the size (how lucky : this building is using some really thin 4cm tall bricks instead of the standard 6cm )
That change and some work on showing the mortar more should bring realism up.
Roughly the process was : building a mesh for the walls with shape of holes , applying brick texture (initially unwrapped , now using box mapping so i can keep tweaking the shape) then create a full wall of bricks (instances , not arrays) then delete unnecessary bricks and give some randomness to the ones left along edges.
All bricks are instances of 1 mesh , color randomness is given in the material by the awesome ‘object info’ node using the ‘random’ output.
The shape randomness is given by a displace modifier (without subdiv )
This makes it very easy to modify, and the polycount is high but not insane for closeup: 150K for the bricks.
then, it’s convenient -when done modelling- to join the bricks togheter : a 150k tris mesh is heavy , but working on a scene with 1000s of individual bricks with modifiers is worse.
Cheers for the further explanation Nicolò – looking forward to any tutorials/walk-throughs!
Waw ! You’ve done a great job, Nicolo Zubbini !
Congratulations for what you achieved !
Fantastic.
By the way, I feel curious to know the shader for the plants ? Are you using raylenght somewhere ? Since there is no news about GSOC SSS : are you faking it ?
the shader for the plants is diffuse + transparent brdfs, and one diffuse texture with alpha to blend the 2.
I never used any true refractions in env. materials.
I.e. for glass it’s just transparent plus glossy reflections (although, i’m not sure about the noise, i hope it doesn’t generate much of it, but it’s Andy who’s doing the proper lighting and will have to check that..)
So about plants , no SSS ..and not even glossy reflections , i think -unless it’s a mainly vegetation scene- you really want to keep the shader simple . It’s already way too easy to get insane policounts for leaves.
I did some experiments last year using VrayBlender (but i guess for this same would be Cycles or any other engine) : using glossy and SSS for vegetation was horrible : hard to setup (especially getting any benefit from SSS) and it put a real strain on the whole ligthing/raytracing with all those tiny faces and transparent shadows.
After looking at Andy last post about compositing layers, I still wonder cause some plants are not far away from the caméra. So What do you guys thing about this http://blenderartists.org/forum/showthread.php?216866-Cycles-tests-the-new-blender-CPU-GPU-renderer-of-awesomeness&p=2138175&viewfull=1#post2138175
Hi thanks!
That looks really interesting.
Nice touch the light path at the end that basically does “do all this complicate stuff only for the last ray , keep it a simple diffuse shader for everything else” (Cycles is really smart, it’s not only the flexibility of nodes, it has really been made in a very logical and well-thought way ..still many tricks and methods to learn)
And makes me think maybe it’s not that much heavier : it’s a general rule about Cycles that while it’s slow for very simple things the benefit is that it doesn’t get that much slower adding complicate shaders.
(i.e. you don’t have to be so paranoid about using glossy on many materials)
Yes using and abusing from lightpath is great.
Did you try the shader on the scene ? Does it really make the rendertime longer ?
And since cycle support alpha quite right, why did you need a lot of vertices per leaf ? A single quad and an alpha mask would do the same, isn’t it ?
i haven’t tryed it on the scene , Andy i think is. (he’s taking it over for lighting and doing tweaks such as the vegetation)
From next week i’ll be free to test all these stuff, and i will!
About lightpath , Andy told me on irc he’s testing that “limit to camera ray” for glossy too.
Good thing we have all materials using instanced group-nodes so we can apply such changes to all materials in a few clicks :)
Is there any way we can all help? Like using farmer-joe (or something similar)to speed up the rendering process?
félicitation Nicolo les initiative comme ceci sont pas facile du tout . du courage
mes félicitation pour toute l’equipe mango et beaucoup de courage